Closing Down
Unfortunately, we're in the process of closing down Crafting4Good CIC after almost
9 years of social enterprise and impact.
Creativity is good for you, but running a busy creative nonprofit on increasingly limited resources is not. As a result the team were stretched, stressed and experiencing the very opposite of "creativity for wellbeing and mental health".
This website *may* stay online under a different name to preserve the legacy and resources created through years of funding with public money.
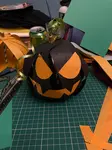
Paper Pumpkins
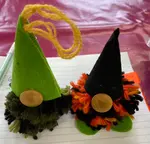
Transform simple materials into delightful paper pumpkins with this easy-to-follow tutorial. Ideal for adding an Autumn touch even if you don't do the whole 'Halloween' thing, these cute decorations are both fun to make and visually appealing.

Here's what we used to make our happy little guys:
- Paper strips, approx 12-16 depending on your straw
- Straws
- Hole punch
- Stick glue or PVA glue
- Green curling ribbon
- Scissors
- Black and green card

First of all, you will need a base to keep your pumpkin standing upright. Cut a square or round piece of card that's about 5cm across. Using scissors, make approximately 2cm cuts into one end of a paper straw, until you have four segments that you can fold back - almost like a banana peel - so they sit at a right angle to the straw. Glue or tape these four segments to the base card, so your straw stands straight up in the centre.
Now make a hole around 1-2cm from the end of your paper strips with the hole punch, on both ends. Dot some glue onto the top side of the base and slide your first paper strip onto the straw. This strip of paper will now stay in place. Now you can put the rest of the strips onto the straw, and spread them out in a circle until they are evenly spaced. Don't glue anything down until you are happy with the placement. Add or take away one or two strips if you need to.
Once you are happy with you circle of paper strips, you can glue them all to each other. as close to the straw as you can. Now take the strip of paper that is on the top and slide the outer end down the straw and glue it into place so there is 2-3cm of straw poking out. Now take the next strip of paper and glue that to the previous one. You will quickly see your pumpkin taking shape. By gluing the paper in order, you will create a smooth curved shape all the way around.

Now you'll have to add some finishing touches. Cut a star shape with five or six points out of green card, and punch a hole through the centre. Glue this to your paper strips to cover the ends. Add some curled ribbon to the straw as vines.


And finally, let's turn your pumpkin into a proper jack-o'-lantern! Out of black or yellow card, cut two triangles or half-circles for eyes, a smaller triangle for a nose and a crooked smile - or frown - depending on how mischievous your jack-o'-lantern is going to be.
Creative Tip!
If you choose yellow card, outline the edges with a thin black line before gluing them on, your pumpkin will appear as though it is lit from within and glowing.

What we learned
Consistency is key for your paper strips, try to get them all the same size for an even shape.
Getting the measurements right for the paper strips takes a little trial and error. If your straw is the wrong size, your pumpkin might end up too tall, or need more strips of paper to fill it out. Too many strips of paper, and the pumpkin ends up too top heavy, and wants to fall over.
The banana paper we used is wonderful for this project: the texture is very organic and the weight is just right (we were lucky to have banana paper offcuts donated by a paper manufacturer).
Just because pumpkins are the traditional halloween squash, doesn't mean you have to stick to orange! Pumpkins come in all sorts of colours, like cream or yellow, some are stripy or speckled, and are growing in popularity as a signifier of the season.
If you don't have green straws, you can decoupage them with glue and green tissue paper.

You Might Also Like:
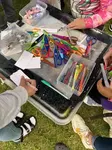
Easy Craft Ideas for Kids - Name Badges & Keyrings
Easy craft ideas for kids at an outdoor gala, making name badges and keyrings
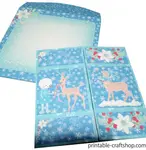
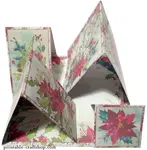
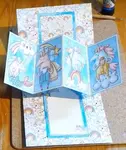
Card Making Tutorial - Never-Ending Card
Never-ending card making tutorial using downloadable "printables with purpose"
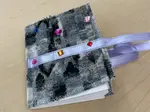
DIY Fabric-Covered Notebooks: Easy Upcycled Craft Tutorial
Create fabric-covered notebooks using recycled materials with our step-by-step guide
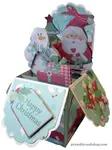
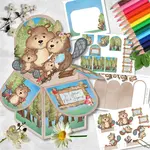
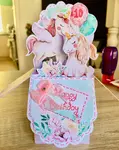
Card Making Tutorial - Pop Up Box
Easy card making tutorial for making Pop Up Box Cards from printables with purpose
Free Craft Supplies
We give free craft supplies to individuals and community groups in the Wakefield (UK) area primarily, subject to surplus
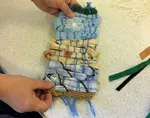
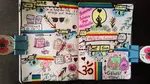
Weaving The Unremembered
Weaving used to remember The Unremembered from our World War 1 project with Big Ideas
Art & Craft Ideas: Activity Library
Art and craft ideas: self care activities for groups, adults, elderly, kids
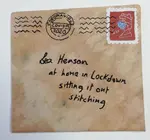
Slow Stitching - Letters from Lockdown
Slow stitching, or mindful stitching is a way of using creativity for positive wellbeing
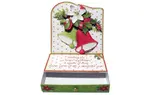
Card Making Tutorial - 4 Fold Flap Easel Card
Card making tutorial for making a 4 Fold Flap Easel Card from our printables with purpose.

Recent Articles
-
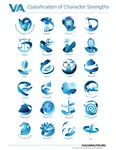
The 24 Strengths of a Person - Discover Yours!
Feb 28, 25 01:32 PM
 The 24 strengths of a person, measured scientifically in psychology, are their 'superpowers' that get them through life
 -
Art & Craft Ideas: Activity Library
Feb 27, 25 04:03 PM
 Art and craft ideas: self care activities for groups, adults, elderly, kids
 -
DIY Paper Pumpkins: Easy Craft Tutorial for Festive Decor
Feb 27, 25 10:58 AM
 Learn to create charming paper pumpkins with our step-by-step guide, perfect for autumn decorations


Crafting4Good CIC is a not-for-profit Community Interest Company, also trading as Crafting for Good, limited by guarantee and registered in England and Wales Company No.10690435.
Registered office: Suite 4, Unity House, Westgate, Wakefield, WF1 1EP