Closing Down
Unfortunately, we're in the process of closing down Crafting4Good CIC after almost
9 years of social enterprise and impact.
Creativity is good for you, but running a busy creative nonprofit on increasingly limited resources is not. As a result the team were stretched, stressed and experiencing the very opposite of "creativity for wellbeing and mental health".
This website *may* stay online under a different name to preserve the legacy and resources created through years of funding with public money.
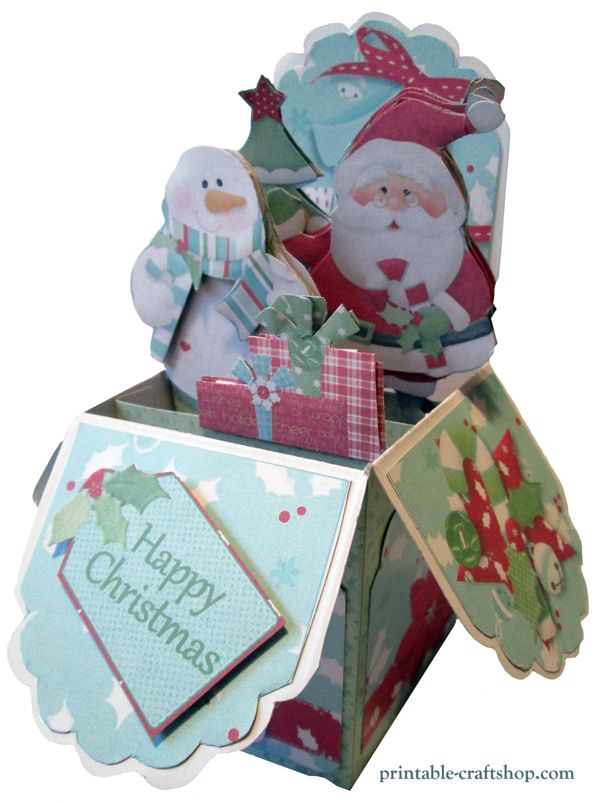
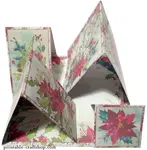
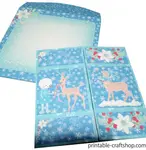
Pop Up Box Card Making Tutorial
Easier than they look: card making tutorial for putting together 3D Pop Up Box cards from our printables. This photo tutorial features the "Festive Trimmings" kit, but you generally make all our Pop Up Boxes the same way and they never fail to impress! Photos don't do them justice really. The card kits are available for instant download in a big value bundle or as single cards.
Our lovely Volunteer Crafter, Debbie has kindly contributed the written instructions, photos and video so you have a number of ways to follow this card making tutorial.
Craft Supplies Needed
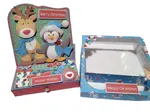
- Festive Trimmings Pop Up Box Printable Card Kit (also available in a big value Bundle of all 10 Kits)
- Glue/tape/3D foam pads for sticking
- Score board/ruler/pencil
- Scissors/trimmer/craft knife & cutting mat
- Print on card stock for all sheets (250gsm was used here but refer to your own printer capabilities)
Time to Make (after printing sheets needed): Average 20 minutes
Instructions
1. Print out the sheets in your kit (printing the backing paper onto the reverse of sheets with lots of white space, since you can then use the 'waste' for other projects). Cut and scored where indicated.
- Front and back of Envelope
- Pop Up Box main sheet
- Topper sheet
- Panels sheet

2. You can decoupage up the topper elements if you wish - this is optional - and 3D foam pads have been used here for this. If you struggle with cutting you may want to avoid extra cutting and just use the flat 'pop up' elements.


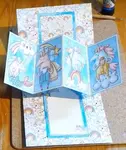
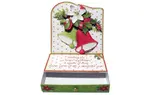
3. Using the Pop Up Box base, stick the panels to the top 'flaps' – remember when they are folded over onto the main card base, they will be facing outwards and upwards so ensure they are stuck the right way up!
 Panels stuck onto top flaps and folded down onto the front of the card
4. Also add panels to the bottom sections and the back section.
 Side and back panels
5. Now to put it all together to make the box. Using the small white flap on the side of the large panel, glue this to the opposite end panel so it forms a box.
 Glue side long white side flap to opposite side, making a box - tape has been used here
 Scoring has helped it to fold nicely into the box shape
6. Inserting the Pop Up pieces: taking the largest tabbed topper that you have, fold in the scored white end sections and glue this inside the box towards the back (about 1cm from the back panel). Do the same with the 2 other toppers, having the smallest at the front.
 Glue and insert the largest tab pop up piece
 Insert all tabs, smallest to front
8. Add the sentiment tag to the front and you have finished your Pop Up Box card – I have used foam pads to raise up the tag but that's optional.
6. To make up the printable envelope, add glue to the 3 white flaps on the back part of the envelope and glue to the front of the envelope. To finish you could add double sided tape to the envelope flap, to seal it when needed instead of getting the glue out when writing your cards.
 Printable envelope for the Pop Up Box card (pardon the shadow)
 Finished printable envelope for the Pop Up Box card (pardon the shadows)
Extra Ideas for this Card Kit
We want you to get as much out of your downloads as possible, so other ideas for using this card kit could be:
- Add glitter glue to make the card sparkle
- Add a pom-pom to Santa’s hat for more depth
- Take the toppers and cut off the tab sections and use as normal card toppers for other Christmas cards and projects
ℹ️ Sell What You Make - you may Sell What You Make for charity, fundraising and personal profit in your small, home-based craft business
Instant Download
Festive Trimmings Pop Up Box Printable Card Kit

Pop Up Box Card Making Tutorial
You Might Also Like:
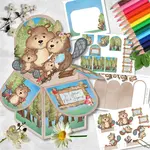
Card Making Tutorial: Acetate Box for Easel Cards
Card making tutorial for making an acetate box lid for a handmade card so you can see the contents. Printables with purpose: crafting for good!
Video Card Making Tutorials
Video card making tutorials to go with our printables, from ArdaCards
DIY Paper Pumpkins: Easy Craft Tutorial for Festive Decor
Learn to create charming paper pumpkins with our step-by-step guide, perfect for autumn decorations
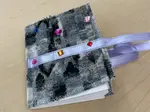
DIY Fabric-Covered Notebooks: Easy Upcycled Craft Tutorial
Create fabric-covered notebooks using recycled materials with our step-by-step guide
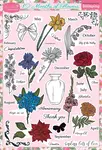
Free Digital Stamp Downloads
Free digital stamp downloads for card making and papercrafts, kindly donated to us by CraftWorld
Easy Printable Greeting Card Ideas
Try an easy printable greeting card if you're in a hurry, or new to handmade cards and want something really easy.
Art & Craft Ideas: Activity Library
Art and craft ideas: self care activities for groups, adults, elderly, kids
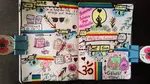
Self-Care Ideas
Self-care ideas for creative wellbeing e.g. journaling, easy no-sew comfy cushions, dreamcatcher patterns etc
Easy Craft Ideas for Kids - Name Badges & Keyrings
Easy craft ideas for kids at an outdoor gala, making name badges and keyrings

Recent Articles
-
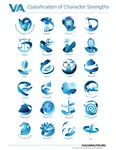
The 24 Strengths of a Person - Discover Yours!
Feb 28, 25 01:32 PM
 The 24 strengths of a person, measured scientifically in psychology, are their 'superpowers' that get them through life
 -
Art & Craft Ideas: Activity Library
Feb 27, 25 04:03 PM
 Art and craft ideas: self care activities for groups, adults, elderly, kids
 -
DIY Paper Pumpkins: Easy Craft Tutorial for Festive Decor
Feb 27, 25 10:58 AM
 Learn to create charming paper pumpkins with our step-by-step guide, perfect for autumn decorations


Crafting4Good CIC is a not-for-profit Community Interest Company, also trading as Crafting for Good, limited by guarantee and registered in England and Wales Company No.10690435.
Registered office: Suite 4, Unity House, Westgate, Wakefield, WF1 1EP